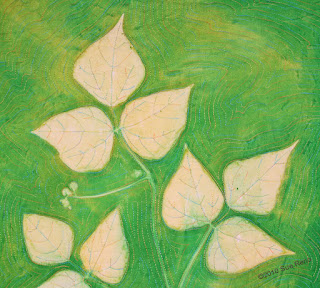
I was working with royal paulownia leaves, which I love because they are huge, and pawpaw leaves, which I also love because they are huge. I used a mix of white pfd (prepared for dyeing, free of fabric finishes) cotton sateen and fabric I had previously painted or printed in some way.
In no particular order, here's a selection of the prints I made.
I did positive prints by painting the plate, pressing the leaves on it pick up the paint, then pressing the leaves on the fabric. I also did negative prints, using fabric to pick up the impressions and paint left on the plate. Basically, I just messed around.
It's hard to go wrong, because any print that's a dud, and those are few, can always be cut up for patchwork.
I was making these just because I could; I don't have a particular project in mind for them.
I also had some royal paulownia leaves that were too big for the gelliplate, so I made heliographic prints. The basic process is to coat the fabric with diluted paint, cover with the leaf, and put in in the sun to dry. The paint wicks out from under the leaf and forms an imprint.
Here's an example, my White Mulberry, where the center image is a heliographic print.
Here's a detail image from Groundhog and Green Bean:And the mustard plant from Skunk and Garlic Mustard:
For these prints, I added lots of gold polka dots:
The sun was too weak to produce a clean white print, but I love the nuance in this one:
And the pawpaw heliographic print has good edge definition. Stitching to add leaf veining will really make it pop.I haven't promoted this in a long time, but my Quilting Arts instructional video, Surface Design Essentials for the Printed Quilt, is still available for download. It covers heliographic printing and a whole lot more, is clear, concise and easy to follow, and you can't beat the price. Available here, treat yourself!


1 comment:
Love the effects of leaf printing. Very cool...
Post a Comment